A CRLG member recently explained to me that state fair categories are use it or lose it – if a certain category has no entries for three consecutive years, it gets removed. She encouraged me to enter multiple items next year, and to expand into categories for items I haven’t tried before. This makes sense to me, and my first experiment is in needlelace yardage.
The minimum length for state fair entry is 12 inches, but I started with a much smaller proof of concept. I did each row from left to right as if it were in the round, then realized that’s not the best way to go about this.
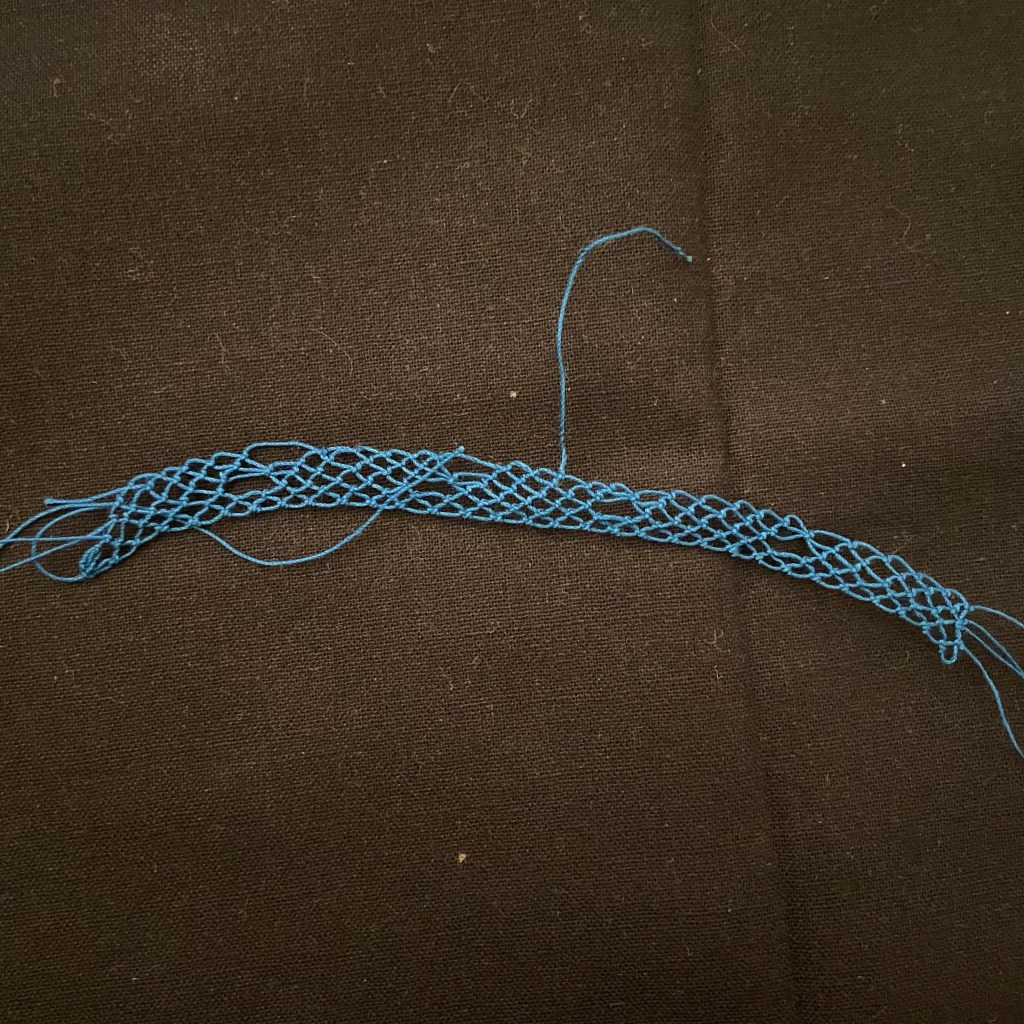
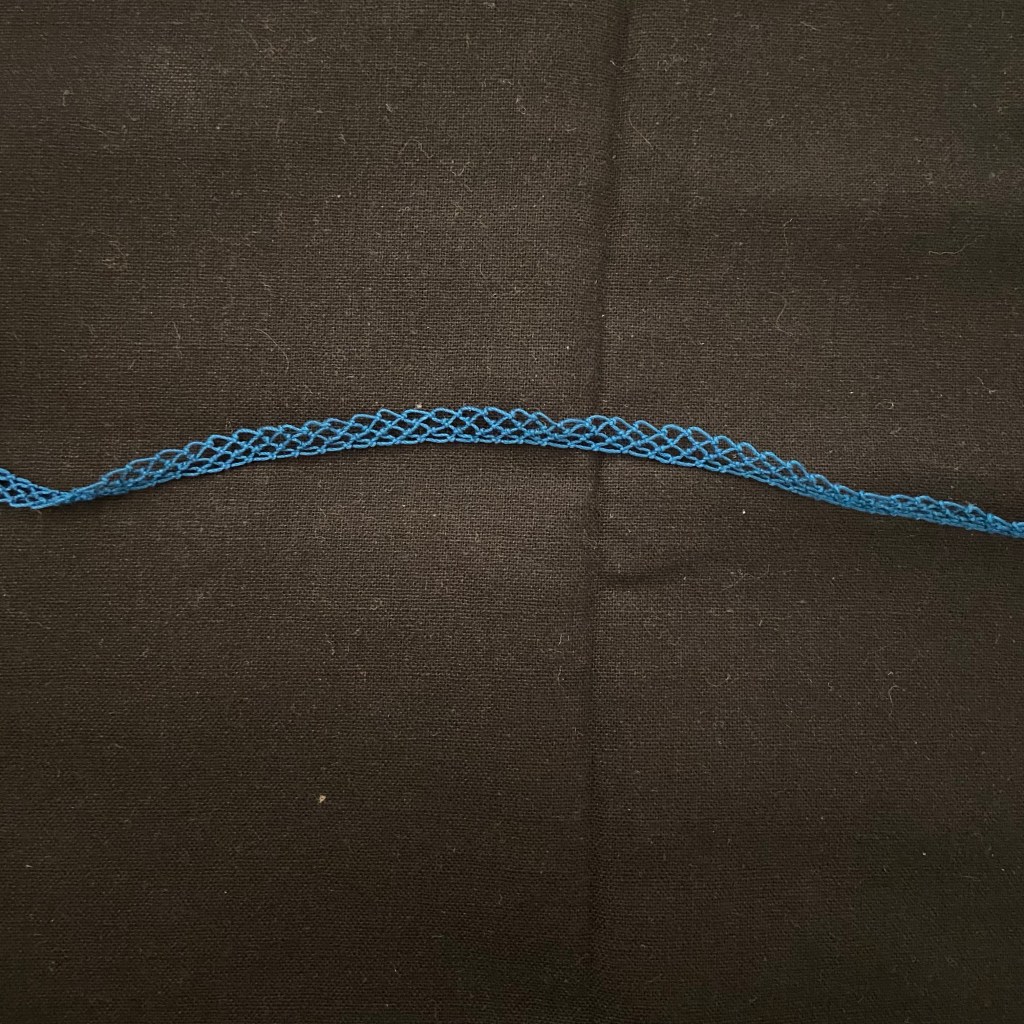
My next piece is the full length it needs to be for the fair, but this time I alternated the working direction. The ends look much nicer but I’m waiting to get a picture of that until I’m finished with the piece. It’s clear in the picture that the lace is curving – I would guess that my tension is uneven as I go across the row.
I’m making the lace along the length instead of the width. There are tradeoffs – small repeating patterns would be easier on the width, but scalloped and pointed edgings need to be done on the length. I’m planning scallops for this piece, so I’m working back and forth across the entire 12+ inches of lace.
I don’t particularly enjoy working from right to left. This is direction the Priscilla Armenian Lace Book teaches, and is how I originally learned. It feels slow and unnatural to me now but it’s probably good practice. I briefly considered trying to switch hands – holding the piece with my right hand and make the knots with my left hand – and ultimately decided it’s more trouble than it’s worth. I taught myself how to mirror knit in order to avoid purl rows, which was definitely worth it. I think I’ll speed up eventually so for now I chug along with my right-to-left rows.
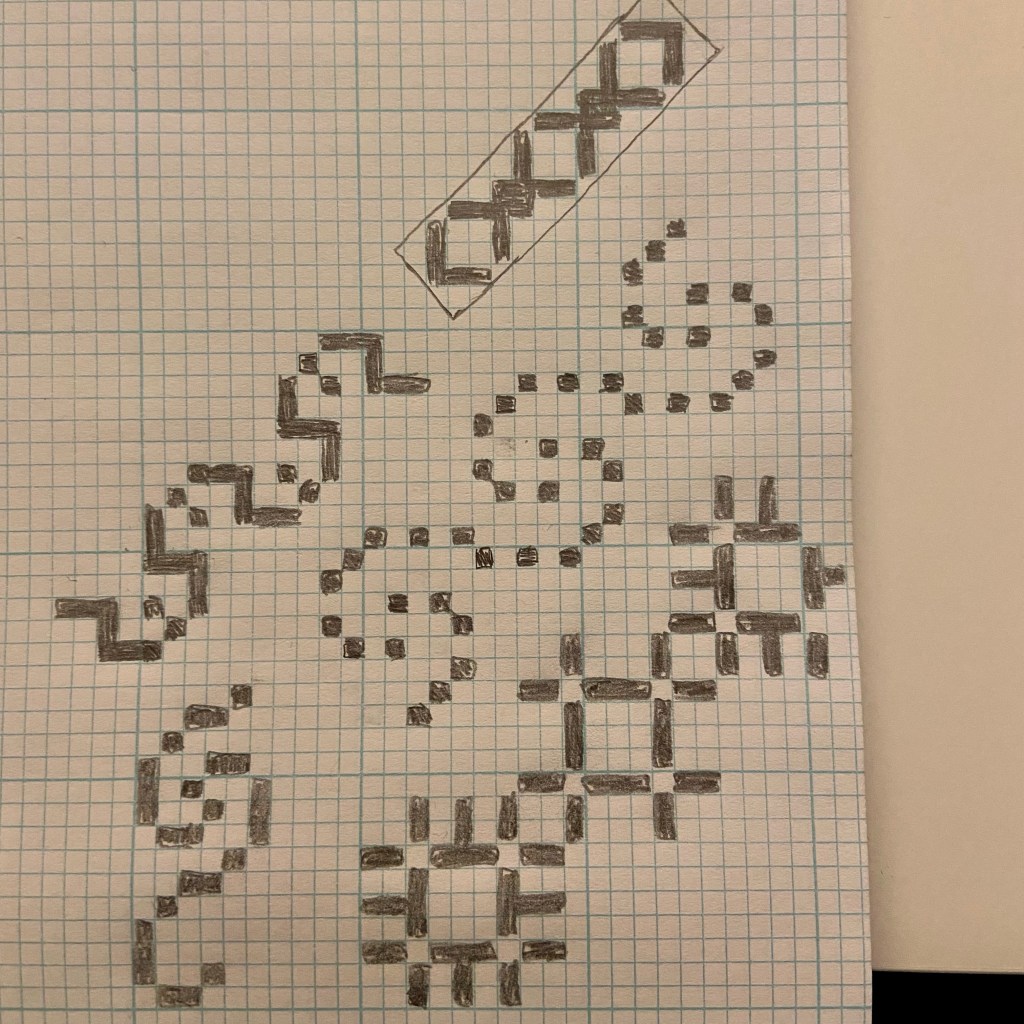
Normally I sketch my lace out on regular paper, but for raised motifs it’s much easier to use graph paper. I charted out a few designs I found in books as well as a couple of my own. The design in the box is what I picked for this piece since I needed something with a multiple of 4 or 8.
I found some other designs I had forgotten about in my pad of graph paper. These were doodles for an Aintab embroidery sampler I’ve been hypothetically planning to make for well over a year. I recently purchased cross stich charting software, so I decided to make a digital version of these charts.
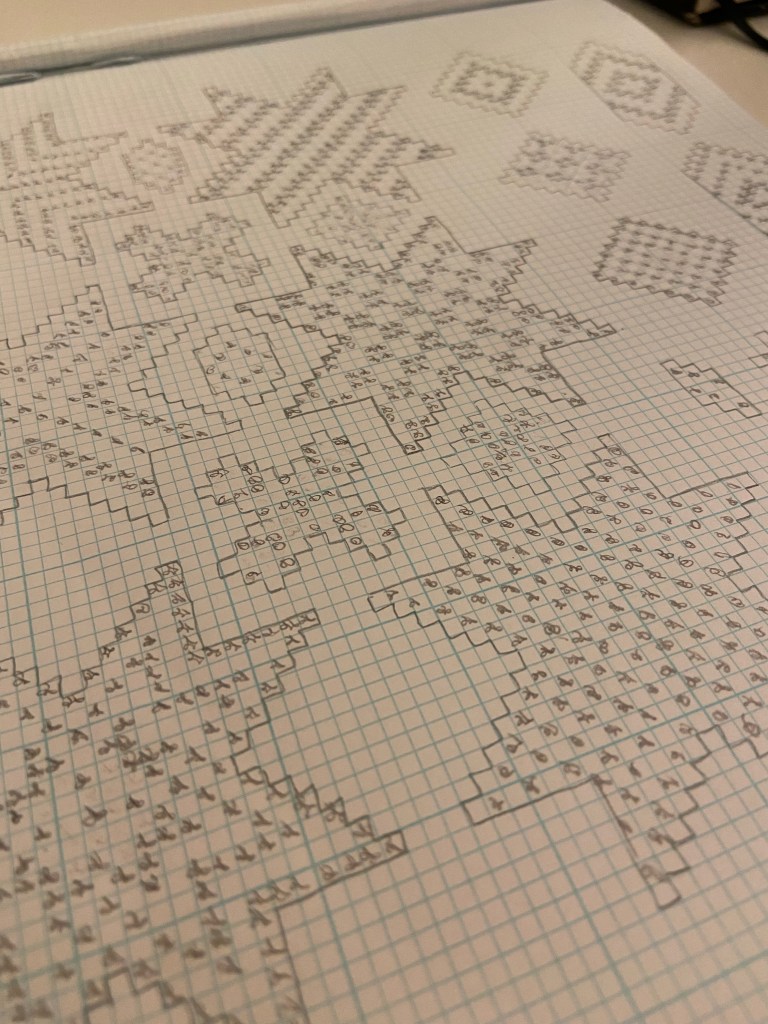
This is an extremely lazy chart – some of the filled boxes represent filling stitches and some represent satin stitches. The backstitching is also just to show the shape outlines and won’t be backstitches in the sampler. Designing patterns for others to use would require multiple colors to represent different stitches, but this type of chart is good enough for me for now.
Each box in the chart represents 4 threads. The filling stitches in the stars would most likely be dove’s eyes or picots. I think it would be fun to find a different filling stitch for each of the small square blocks. These could be taken as large 12 thread squares or a grid of 4 thread squares, which presents an interesting design opportunity.
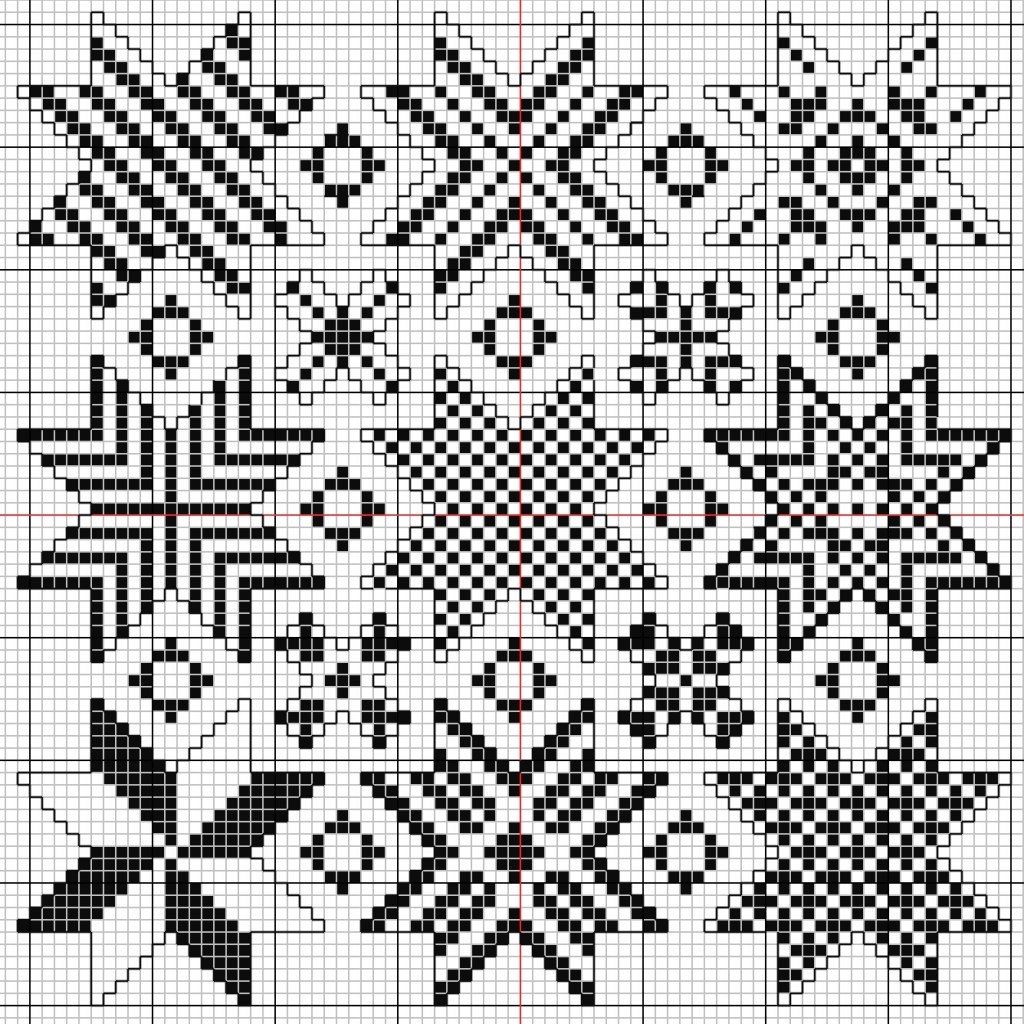
I have a piece of fabric I’ve been saving for an Aintab sampler and this chart should fit very nicely on it. On 40 count linen with a nice border, this design should come out to 10×10 inches. My linen is 13×17 inches which leaves room for framing.
I purchased the iPad version of this software because I would much rather draw the chart with the pencil than click on every square. The app is truly infernal though. I made it work for my purposes, but I may end up needing the desktop version anyway. Time will tell.
I have no business starting a new project so I’m going to sit with this idea for awhile and continue playing with the chart. I’ve concluded I like planning projects more than I like working on them. This type of design is a very satisfying puzzle to solve and it feels good to get something out of my brain and on the proverbial paper.

